Viser opslag med etiketten Dragon. Vis alle opslag

onsdag den 9. marts 2011

Fininshed Dragon: Moneyshots

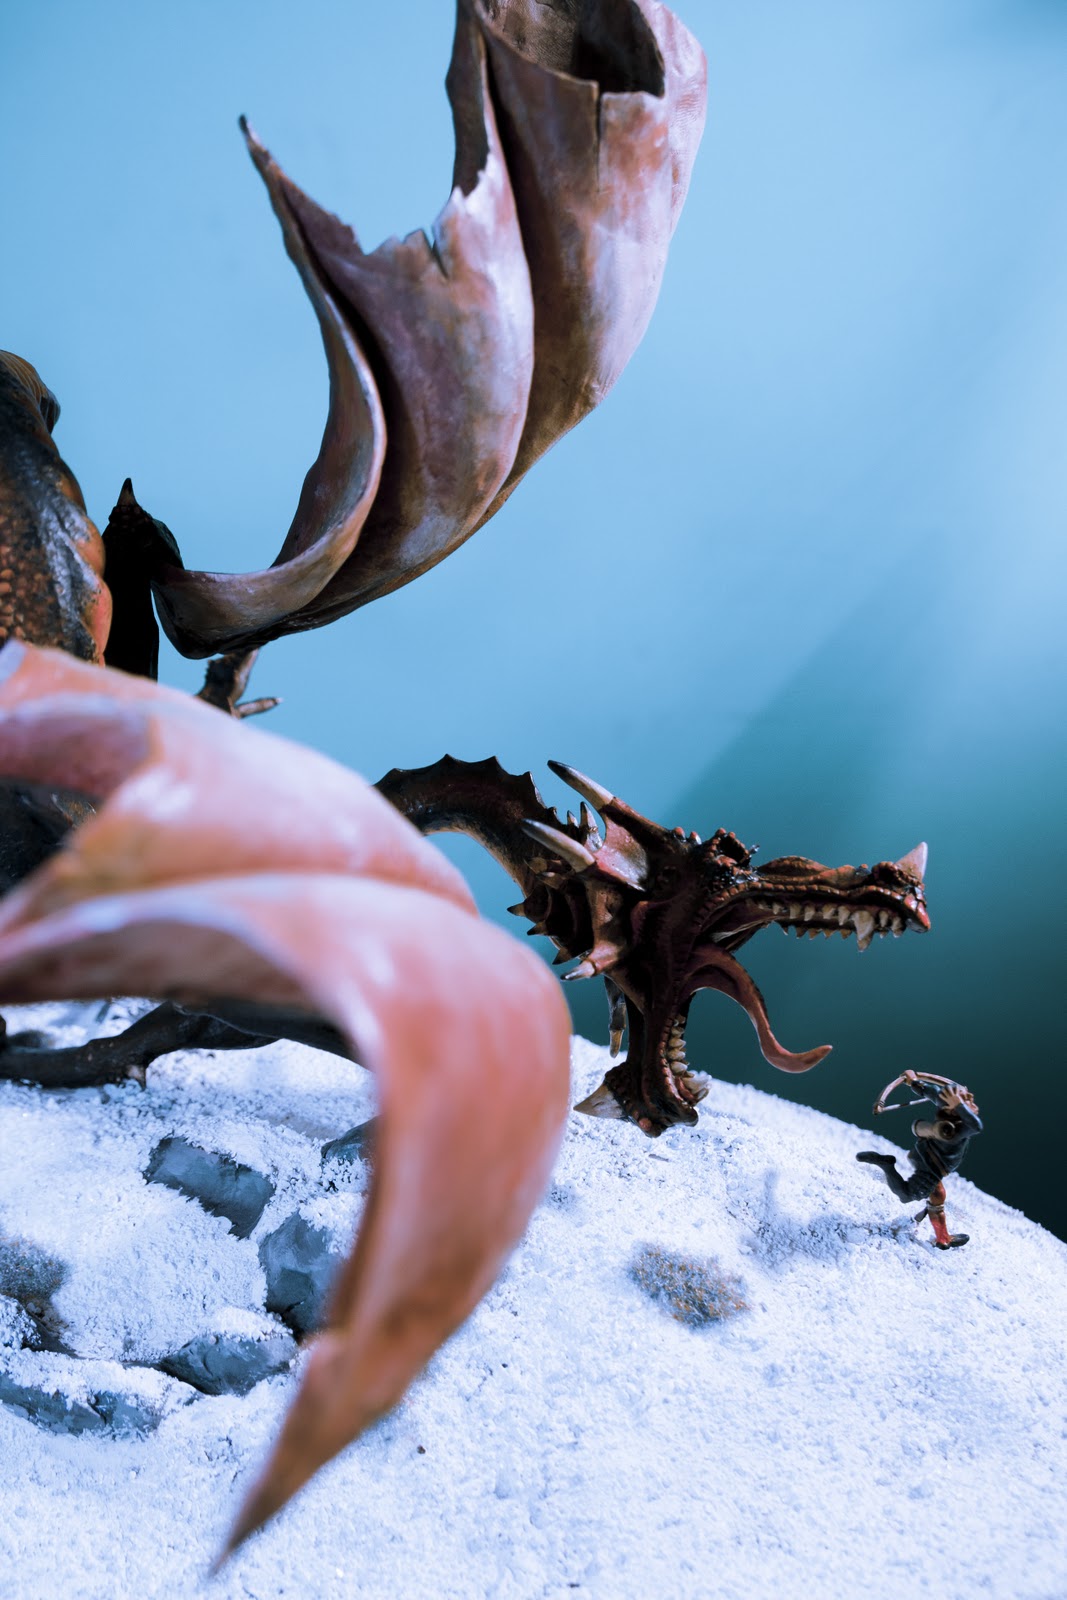
The colour scheme was based the colour of an uncooked lobster. Again, the coolest and most unexpected patterns and colour palettes are all located in nature, so go there for inspiration. Notice btw. the added archer. Notice the fear in his eyes. Bwa ha ha.


I'd like to thank the following people:
  • Anders Clausen for his stunning photos of the finished dragon.
  • Greta Clemente and  Claudia Marvisi  for some truly excellent production photos.
  • Henrik Malmgren for some well placed kicks in the head when asked to do so.
  • Christophe Peladan for the unwarranted sarkasm : P
  • Kitija Matisone for suggesting I take production photos and the moral support.

Fininshed Dragon: The base


Here I am holding my creation. Naturally I was excited, but at the same time a bit miffed that I'd forgotten to shave or indeed wash my hair.

Initailly I'd thought about removing the dragon from the wooden plank to which it was attached, but I was afraid I might have created a strain to the wire when I stapled it to the plank. If that was the case, I might risk the dragon breaking into pieces as the wires returned to ther original position.

Then it was suggested I might keep the dragon on the plank, carve the plank into a pleasing shape and then attach it to a larger base. I did this and it worked admirably as it would also make the dragon easier to observe from its raised position.


This was the end result. After carving the planks and gluing them to the base, I sculpted it into a hill with boulders and a cliff using Fimo Light. It is light weight, relatively cheap, easy to sculpt with and most importantly, it cures when exposed to the open air for a longer period of time i.e. it dries out. Once again I'd dodged using an oven.

The base I had gotten specially made for a paltry 5 £ (My old wooshop teacher from elementary school was very reasonable with the price) I coated the side of the base with tree polish (or something like it) sanded it, then repeated the process three times till I'd achieved the desired  effect. 


Then I painted the details on the base, added a layer of sand, painted it white and finally glued shards of crushed light bulbs on top of it all and voila. a finished dragon! Meanwhile I'd also designed, sculpted and painted the archer, but that process will be covered next.

Finished Dragon: Details details


I was happy with my tree for about two hours until it was pointed out that it didnt look like a tree. I then placed a thick layer of green stuff on the stem and mutilated it until it looked like bark. I drilles some holes into it as well and stuck some wires which I sculpted into branches. You will see the finished result later.


These were the absolute last details I sculpted before moving on to the wings. I sharpened the claws on the hands and feet once I'd baked them. Its so much easier to carve sharp edges than it is to sculpt them. The membranes in the ridge on the dragon's back were made simply by squeezing thumb an indexfimger against the sculpy and removing the excess. I made the membranes in different sizes and made the larger more detailed to give some variation.

The horns on the elbows and kneecaps were surrounded by smaller horns gradually turning into scales. This would help me pick out a few large scales when painting the dragon, which would also add to the variation in skin texture.


I baked the head first before attaching it to the neck. That way I could press the socket in the back of the head against the end of the neck to make them better fit together. To make the head stick, I added a layer of green stuff un top of the joint after gluing them together.

I'd decided the dragon would be chasing an unlucky archer, so I added an arrow to the eye of the dragon. Then there would also be a little story behind the piece, which is always welcome.

Finished Dragon: The wings

Another little piece of advice: Don't ever never ever sculpt something which require a large set of wings attached to it! If you do anyways, here's how I did it:

Make a frame for the wings using wire. When wrapping a wire around another wire do your best to wrap it tightly. If you don't, it'll stick out and give you a lot of grief when applying the sculpy. I wanted my wings to be pretty lightweight to minimise strain to the wireframe. Therefore I had to be economic when applying sculpy to the membranes on the wings. This is when you'll be glad you spend the time necessary to make a good quality skeleton!


I made the membranes by flattening a large amount of sculpy like cookie dough. Then I cut it into appropriate sizes and placed them on top of my frame. I worked one piece of memebrane at a time, so each individual wing would require four pieces of flattened sculpy to make. lastly I used my fingers to flatten the sculpy as much as I could without exposing the wireframe.


The day I had to attach the second wing had arrived. I'd baked the dragon and the unattached wing and then, after taking a deep breath, I proceeded to drill into the shoulder of the dragon. At this point I'd decided to strengthen the shoulder by adding a layer of Green stuff  (also known as Kneadatite), to the shoulder and also to the drilled socket itself to as a shock absorber to the sculpy.Green stuff unlike sculpy is not brittle, but quite bendy and won't crumble or break as easily.

Green stuff is a two part epoxy component which cures after a day or so of being mixed. This would be perfect to use as I'd already baked the dragon once, and didn't want to risk it getting burned by another go in the oven. It was also useful for repairing cracks in the sculpy, which had appeared after the dragon had been baked.


After adding the layer of Green stuff to the joint I had to let it cure. Luckily, I had a roll of toiletpaper I didn't need, to stabelise it while it did so.  


The green stuff at the tip of the wing was added because the wing, being unattatched to the dragon before being baked, had to be stapled onto a wooden frame for it be sculpted properly. The green tip of the wing is the covered piece which had been stapled to the wireframe.

søndag den 6. marts 2011

Dragon Skulpting: Head


This was a straight up sculpting job. No little neat tricks to easen the mind, just pure leg work. One thing though. The membranes connecting the horns were made by placing an excessice amount of sculpy on the horns themselves and then gradually smoothen the excess out thowards each other to make them connect. That way the membrane would look thinner in the middle and thicker at the edges, as it should be.

Ah yes again: Big shapes first. Details in the end. Here the details were the scales and the small horns.


I think the end result speaks for itself. I Added an extra wire for the tounge, and then looked a looot at pictures of  lizards to get the scale texture down precisely. Here's another little tip: you may think you know what stuff in nature looks like, but you don't. Do the research, then go to work, and if that is too boring or hard to replicate, then bend the rules. Just make certain you check out what the stuff looks like in real life before trying to replicate it! You may get inspiered and you may save a lot of time.

I sharpened the teeth with a knife once I'd cured the head in an oven. Dont screw it up by being impatient and trying to do everything at once. Plan your progress, but leave room for cool accidents to happen.

Dragon Skulpting: Finishing step and textures


I found some additional production photos. 

I was very careful to count the number movable "joints" on the underside of the dragon before starting to sculpt it, ie. I didn't want there to be an uneven number of joints on each side of the belly. Because of the even number of joints I'd have to make, each joint would have to stretch or squeeze according to what its twin joint on the opposite side was doing. If one joint was stretched out, the other had to be squeezed together. The finished result made the dragon look more organic and flexible.
 

This was the solution a came up with concerning the wing muscle/arm muscle problem. At the same time it gave me a nice chance to brush up on my knowledge on back and shoulder muscles.


I decided that the belly joints would  go all the way up to the tail and then I would start work on the textures.


This was the finished result. I'd looked at some photos of lizard scales and forund out that larger scales tend to be situated on the back and then get progressively smaller the further it goes thowards the underside/stomach.

The texture on the body were made simply by gently pressing a drill bit against the surface and then let it run along the until you get the desired effect. The larger scales on the back would be made by placing tiny blobs of sculpy on the surface and then smoothing them out till they looked the part. I left the underside smooth to give some variation  to the piece and also to make it easier for ppl to distingush what is up and down.

I would later replicate the process on the head.

lørdag den 5. marts 2011

Dragon Skulpting: First step. Part 2


More work in progress photos. A good rule of thumb when sculpting is to limit yourself to a couple of simple big tools in the beginning. I find it easier to keep away from going in to details too soon, if the tools I'm using are ill suited for the purpose. Later sure, go crazy, but keep to the big tools in the beginning.


At this stage I'd figured out where everything should be placed on the dragon, shoulders, hips, chest and so forth. The the next step was to start bulking out the fella. I did it like this; Main body, then arms and legs and finally I'd do the hands and feet.

But  working on the bigger shapes was far from tedious work. You still have to figure out how all the muscles would react to each other; How one shoulder would look streched one way and then how the other shoulder or indeed the chest muscles might react to that specific movement.   ...yeah well, I guess you had to be there.

Dragon Skulpting: First step: Part 1


My main drive is to make stuff you want to look at: Who doesn't?! I think that is easier than it sounds. We humans are born curious, so anything new automatically has a certain attraction. The difficult part is to keep the viewer interested. At the same time I want my stuff to look alive. If something looks alive it's easier to keep the observer interested: You don't think you've seen the full potential of a sculpture if it looks as though it could change position any second it pleases, leap into your lap or steal your wallet. If you haven't seen it all, then maybe you'll want to look at it again, non?


Rule nr one when trying to make a realistic sculpture is: To keep looking at at your work with symmetry in mind. When to apply it and when not to apply it.

The body is overall more or less symmetrical, but at the same time its not. Just consider the internal organs. We dont have two hearts or livers do we? Would you call your own face symmetrical? No and probably not. And if your face is symmetrical, please leave your phone nr.

What I do when sculpting is to aim for symmatry to begin with: Everthing must be proportionally correct. Then I start posing the sculpture and then I throw symmatry out out the window. When I'm done posing the sculpture, I double check the entire thing, to see if I've been symmetrical enough.

Rule nr two is: Be as asymmetrical as possible when posing a sculpture. Nobody, and I do mean nobody does a symmetric pose in nature. there is always weight and counter weight. My mistake was to assume a decending dragon would have its hind legs curled up under its body eg. the symmetrical approach. This may be a realistic approach to how a flying dragon would look, but it's also rather boring to look at. Rest assured I got a few deserving comments about that.

I let the legs flail about. It look rather cool and at the same time it adds to the chaos and turmoil of the piece, gives the body weight and overall credibility. Believe me, a dragon can use all the credibillity it can get.


To be honest I didn't have an exact idea about how the body would be twisting around itself until I got to actually sculpting it. For this project I'd be using super sculpy. I does not cure/harden until you have baked it in an owen. Perfect for time consuming projects. Just remember to keep you hands clean or the sculpture will soon start to look dirty. I made a snake of the dragon as seen on the pictures above and then I flattenet it into a flesh like sepentine. One edge of the serpentine would mark the spine, the other the middle line in the stomach.

Then I went to work on the arms and legs, got the muscles placed. Made a small self study of the back and shoulder muscles. One quick note: Don't get carried away with small details! DON'T.
I did. Got so excited I accidentally sculpted a foot. Then I slapped myself and continued my work on the main body. Stick with the big picture till it's done

fredag den 4. marts 2011

Dragon skeleton: head

This simple creation would later turn out to become the head of the dragon. The thicker piece of wire would become snout and jaw. The thinner would become horns.

I took my inspiration for the placement of the horns, the spread out look, from lizards who become agitated and "puff up" membranes on the side of their heads. I did this to further emphasize the mood of the beast.

Dragon skeleton: body


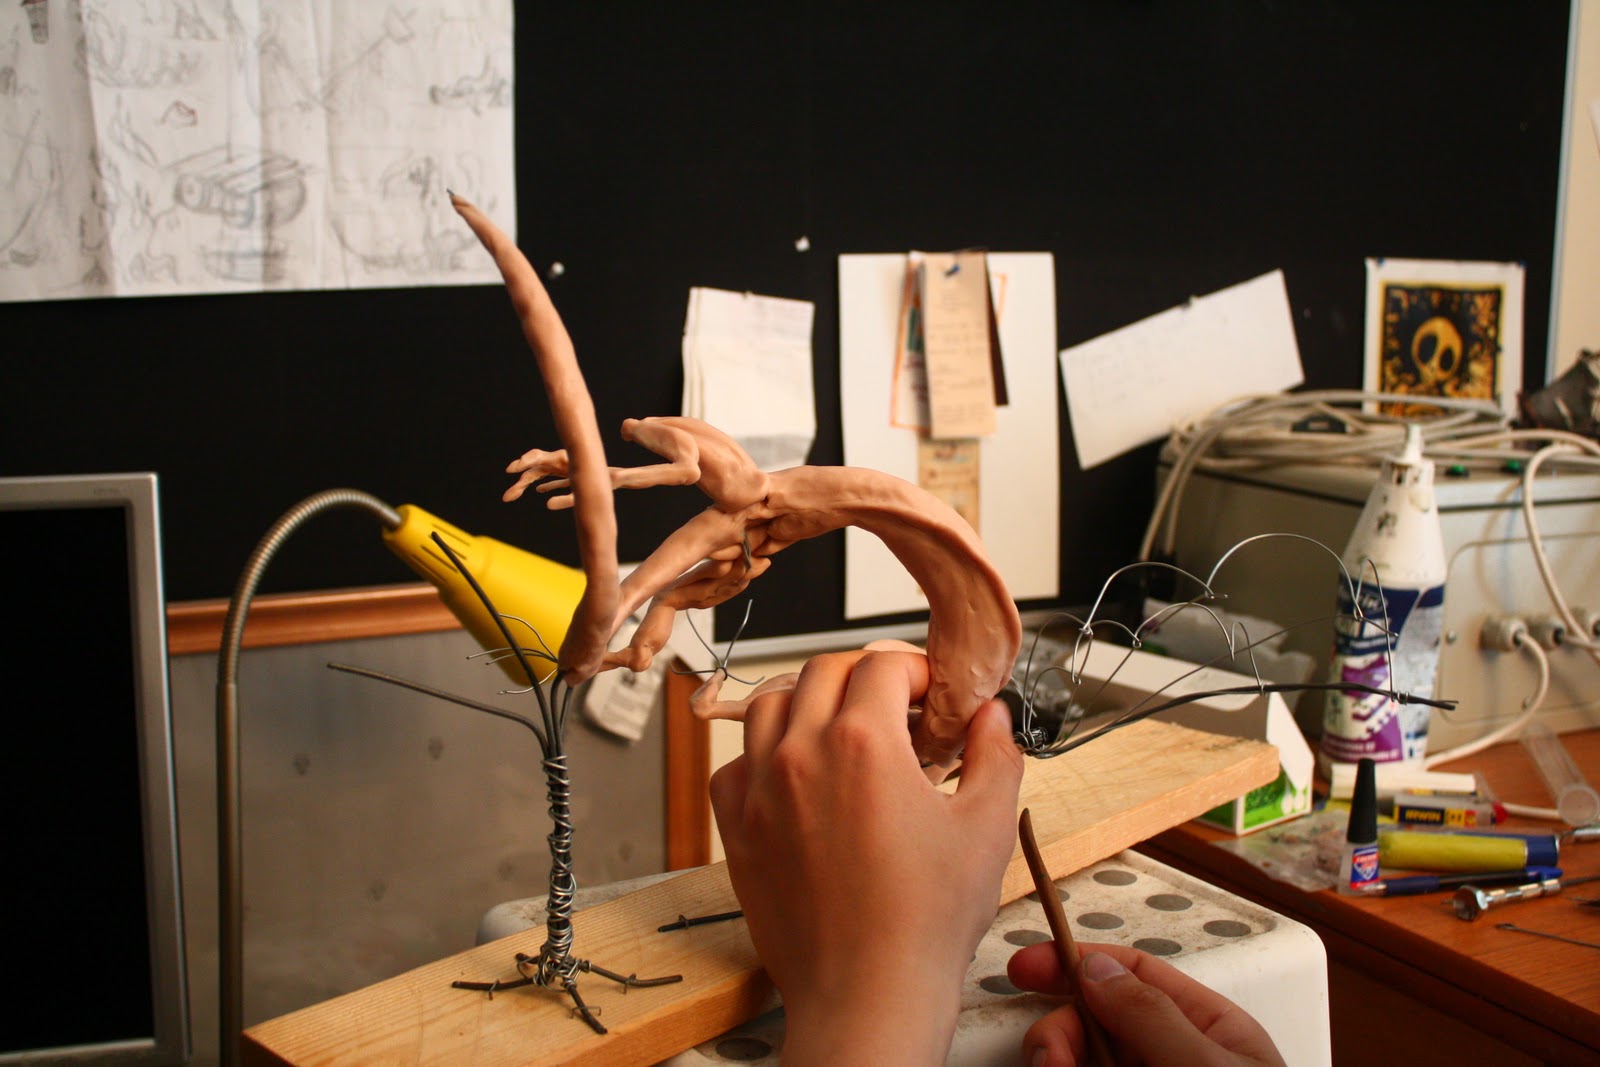
The first thing i did whan I started out, was to take four rather thin cords of wire and then wrap them around my arm until I'd determined the proper lenght and shape of the main body. After I had the body shape I added arms and legs using much the same method, but was careful to measure out extra wire for the limbs to wrap around the main body.

Then I strengthened the skeleton with a much thicker wirecord , just the main body and wing basically, and left some spare cord which I could attached to a wooden base with a stapler. Every major wire was carefully connected using ordinary garden wire.

I repeated the process when I added the tree and connected the brancehes to the dragon's tail for added support to the entire thing.

At this stage I decided only to add one wing to the main body frame. This I did because I knew it would be hell to sculpt both the body but also the second wing if I attched it at that point. It was a gamble as I was not quite certain how durable my sculpting material would be, if I had to drill the second wing in place, but I concluded that the alternative would be worse.

Fifth dragon sketch: Head


What do you do when you can't decide what face to wear?

Easy; you take all of your drawings, walk into the nearest kitchen and ask the comlplimentary three italian people sitting there. 'Cause if you have a question about design, you ask italians.
Grazie mille Greta, Claudia and Leo:)

Didn't make a drawing of the finished head design. Decided to sculpt it then and there.

Fourth dragon sketch: The wings


Next up came the difficoult task of sorting out the physiology of the wings; How to place the arms and subsequently the wings compared to each other. It had to have both or it wouldn't be a proper dragon!

I decided after some deliberations to place them next to each other and not on top of each other, as I'd seen other  people do. I was sorely tempted though, as it would probably be easier to do, but if I placed the wings on top of the arms, then there would be no room for the shoulder blades and muscles connected to the arm.
Hence I had to figure out how to place the limbs in  front and behind each other,

I also played around a bit with the look of the wings themselves; I took my inspiration from pictures of bats as I thought it would look the coolest, but also becaue I tend to go for the classics when it works.

Third dragon sketch: Proportions

Next up I thought about why the dragon was spiralling downwards as if to attack/eat something. I decided it was trying to eat a human. Why it did, I'd have to figure out later, but I was going to make it pretty large compared to a human if it should be able to swallow it in one gulp.


Next up I worked a bit on the proportions of the hips and shoulders compared to the rest of the body. I went for a chinese snake like dragon. To better emphasize the slinky movement it would be making as it was spiralling thowards the ground.

Second dragon sketch: Postures and accessories


This was the finished posture I came up with. I was happy with the speed and the weight of the dragon.

I made the practical choice of supporting the back end of the dragon with something. At first i thought a building would look rather neat, but decided against it, as it would take too long to do. At the same time I wanted the dragon to be the main attraction of the piece, hence a tree was needed! It would also lend some menace to the dragon, if the tree were to be split in two by the tail of the creature.

First dragon sketch: Initial idea

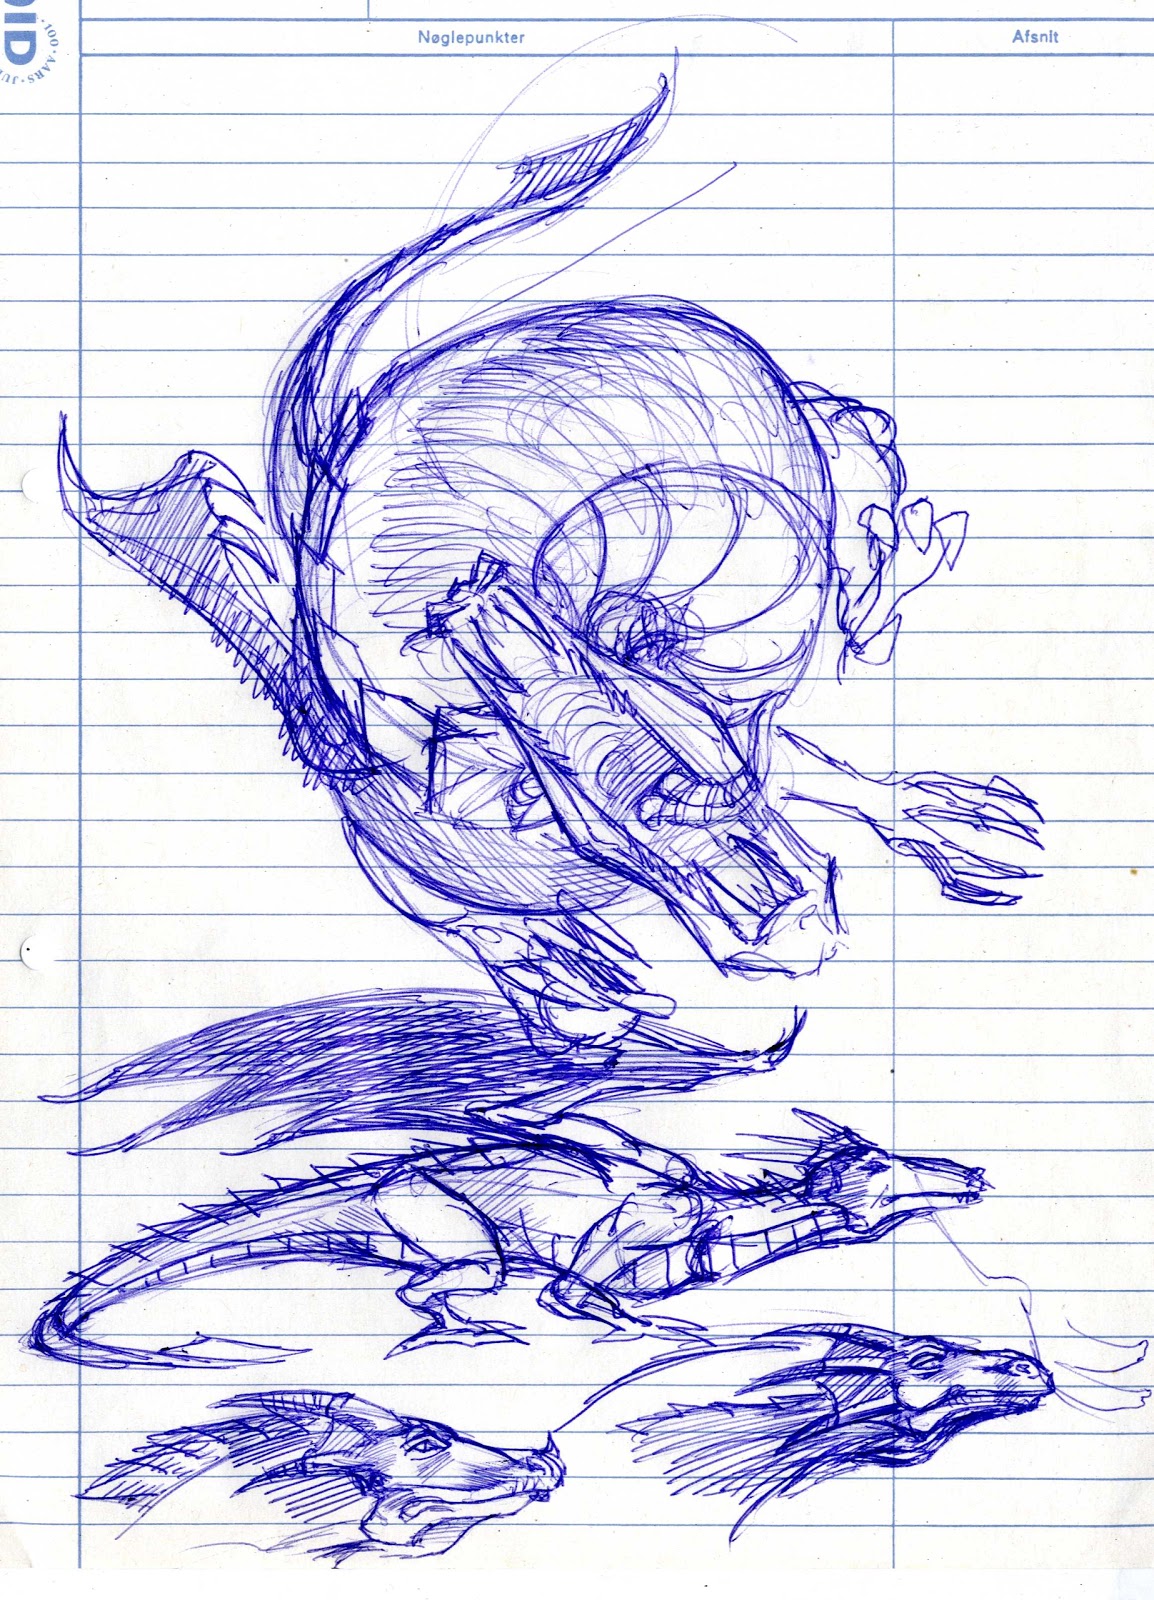
I woke up one morning and decided then and there to sculpt a dragon, as you do (must have been something I ate the previous day) This was the first sketch I did. I had the posture down more or less, but it still needed some additional work before I'd commit it to reality. Also for it to spiral, I'd have to slim it way way down.